Using Samba share to backup iMac with Time Machine

We have one iMac, which I backup to my Synology with Time Machine. Right now, I’m switching to mini pc with external harddrives and Nextcloud.

To enable backup for the iMac over Time Machine, I had to setup Samba. These are the steps:

Install Samba

sudo apt install samba

Setup a new user to connect to the share, where the backup files should be stored.

sudo useradd -m backupuser
sudo passwd backupuser
sudo smbpasswd -a backupuser

My external drives are mounted to /mnt/data. For this backup case I’ve created the following folder structure: /mnt/data/samba/time-machine/imac

Samba configuration happens in the file /etc/samba/smb.conf

First some basic configuration to enable Samba to handle requests from Apple correct:

[global]
## Configuration for Mac OSX
vfs objects = fruit streams_xattr
fruit:metadata = stream
fruit:model = MacSamba
fruit:veto_appledouble = no
fruit:nfs_aces = no
fruit:wipe_intentionally_left_blank_rfork = yes
fruit:delete_empty_adfiles = yes
fruit:posix_rename = yes
Then I have setup a share for time machine. See the fruit: lines, these are for to make this share Time Machine compatible.
 
[timemachine_imac]
path = /mnt/data/samba/time-machine/imac
read only = no
writeable = yes
valid users = backupuser
fruit:time machine = yes
fruit:time machine max size = 1T
Change the ownership of the folder to the backupuser.
 
chown -R backupuser:backupuser /mnt/data/samba/time-machine/imac
 
And finally restart Samba to apply the configuration changes
 
systemctl restart smbd
 
Try to access the share from your client with the smb protocol. Used url could be smb://yourserver/timemachine_imac. Login with the backupuser.
 
On your Mac, open up the connection in Finder, login. After that, you can add this share as a destination for a Time Machine Backup.


Zigbee -> OpenHAB -> ha-bridge -> Alexa | Device not recognized by Alexa

I’m using Zigbee switches to control some lights at home. They are imported into OpenHAB, so that I can control them with the OpenHAB mobile app.

To control them by voice over one of the Echo devices, I use ha-bridge, which emulates a Philips Hue bridge which then can be used to discovery the switches by Alexa. Until now, everything worked in this combination. Today I tried to setup a new switch for a new light. Setup in OpenHAB worked out ot the box, but Alexa did not recognize it.

After some digging I found this comment. Main problem solver seems to add a „00:“ in front of the unique id for the device, because it needs now 9 bytes for the unique id. In case the comment would be deleted:

  • sudo systemctl stop ha-bridge
  • cd ha-bridge folder
  • cd data
  • sudo nano device.db
  • use CTRL+W and search „unique“ to find the unique ID’s
  • add „00:“ at te beginning of every unique ID
  • save the file
  • sudo systemctl start ha-bridge
  • press „Discover“ within the Alexa app/site
  • while Alexa is discovering, press the Link-button under „Bridge Devices“ within HA-bridge (make sure „Use Link Button“ is checked under Bridge Control -> Update Security Settings)
  • the devices should show up within de Alexa app/site

Backup mails – backup and restore

After setting up a Dovecot instance and having imapsync running, how could I do the main task, the backup?

I use tar with its incremental option (infos about can be found here and here). Also I compress the backup, if you have pigz on your computer, use it, it makes the backup a lot faster because it uses all cpu cores.

Create first backup

sudo su -
cd /var/lib/docker/volumes/dovecot-server_dovecot-server-home-volume/_data/testaccount
tar -cvzf /root/testaccount-mail-backup-20240817.tgz -g /root/testaccount-mail-backup-20240817.inc Maildir/

To use all cores while compression:
tar -cvf /root/testaccount-mail-backup-20240817.tgz -g /root/testaccount-mail-backup-20240817.inc --use-compress-program=pigz Maildir/

Create next incremtal backup

cp /root/testaccount-mail-backup-20240817.inc /root/testaccount-mail-backup-20240818.inc
tar -cvf /root/testaccount-mail-backup-20240818.tgz -g /root/testaccount-mail-backup-20240818.inc --use-compress-program=pigz Maildir/

Restore mails vom backups

cd /var/lib/docker/volumes/dovecot-server_dovecot-server-home-volume/_data/testaccount
tar -xvf /root/testaccount-mail-backup-full-20240817.tgz --use-compress-program=pigz Maildir/ -g /dev/null
tar -xvf /root/testaccount-mail-backup-full-20240818.tgz --use-compress-program=pigz Maildir/ -g /dev/null
ls -la
# (1003:1003 is the group and user-id of the testaccount, change to the values for your account)
chown -R 1003:1003 Maildir/

Backup mails – setup imapsync

For backup of my mails, I have started with setup a local Dovecot instance (Backup mails – setup of a dovecot server).

Back in the days, I already searched for a solution and used imapsync. Because of my own examples how to use it and good experience with it, I used it again. It will be used to sync the mails between my main mailaccount and the local Dovecot accounts.

Install imapsync

To install imapsync, some software needs to be installed. From the official install documentation, you get the for different os the instructions, what and how to install. For me it is Ubuntu.

sudo apt-get install  \
libauthen-ntlm-perl     \
libclass-load-perl      \
libcrypt-openssl-rsa-perl \
libcrypt-ssleay-perl    \
libdata-uniqid-perl     \
libdigest-hmac-perl     \
libdist-checkconflicts-perl \
libencode-imaputf7-perl     \
libfile-copy-recursive-perl \
libfile-tail-perl       \
libio-compress-perl     \
libio-socket-inet6-perl \
libio-socket-ssl-perl   \
libio-tee-perl          \
libjson-webtoken-perl   \
libmail-imapclient-perl \
libmodule-scandeps-perl \
libnet-dbus-perl        \
libnet-ssleay-perl      \
libpar-packer-perl      \
libproc-processtable-perl \
libreadonly-perl        \
libregexp-common-perl   \
libsys-meminfo-perl     \
libterm-readkey-perl    \
libtest-fatal-perl      \
libtest-mock-guard-perl \
libtest-mockobject-perl \
libtest-pod-perl        \
libtest-requires-perl   \
libtest-simple-perl     \
libunicode-string-perl  \
liburi-perl             \
libtest-nowarnings-perl \
libtest-deep-perl       \
libtest-warn-perl       \
make                    \
time                    \
cpanminus
sudo cpanm Mail::IMAPClient

git clone https://github.com/imapsync/imapsync.git

cd imapsync

./imapsync --testslive

Setup imapsync

For each account, I want to sync, I setup a shell script with the commands to start the sync.

#!/usr/bin/bash
./imapsync \
--host1 imap.example.com --port1 993 --user1 username --password1 secretpassword --ssl1 \
--host2 localhost --port2 143 --user2 testaccount --password2 secretpassword2 --nossl2 --delete2 \
--nofoldersizes --exclude Trash
# --dry --justlogin
If you want to try out first, if login to the two servers with the account data works, uncomment the last line and add a \ at the end of the „Trash“. In that case, imapsync will try to connect and give you some information about, if connections were successful.

With the shell script you should be able to sync mails between first and second mail account. First sync can take some time, depending on the amount of mails.
 

Gmail options

If you have a gmail account, there is an option, which optimize the handling for gmail. If gmail is the first (source) account, add –gmail1. Information about handling and options can be found in the imapsync documentation for gmail. Important is the part to receive an app password for your gmail/google account! This is my shell script to sync gmail into the Dovecot instance.
 
#!/usr/bin/bash
./imapsync \
--host1 imap.gmail.com --port1 993 --user1 yourmail@gmail.com --password1 apppassword --ssl1 --gmail1 \
--host2 localhost --port2 143 --user2 verena --password2 secretpassword --nossl2 --delete2 \
--nofoldersizes --exclude Trash
# --dry --justlogin


Backup mails – setup of a dovecot server

Over the years, I have received a lot of mails, not all of them were moved to trash. Time to think about a solution to backup them and have way to restore them, if ever needed.

After a little thinking, I decided to use the following technics:

  1. Setup a local imap server (Dovecot) in Docker
  2. Setup local users in the dovecot server to sync the mails into it.
  3. Backup the mails stored in Maildir format by Dovecot with incremental backups.
  4. Try to restore the backup into a testaccount, to validate, the this is working

Currently I will execute the backup and restore steps manually. If I think after some time, it is bulletprof, I will think about how to automate. Right now the focus is on setup the infrastructure and commands to make backups possible.

How to setup a local dovecot server with Docker

I will run the Dovecot instance on one of my computers, currently it is running on my notebook.

Dockerfile

I use Ubuntu 24.04 for the Dovecot instance. 

FROM ubuntu:24.04

RUN apt-get update \
&& apt-get upgrade -y \
&& apt-get install -y dovecot-imapd locales \
&& apt-get clean \
&& locale-gen de_DE.UTF-8 \
&& update-locale LANG=de_DE.UTF-8 LC_MESSAGES=POSIX
COPY ./files/dovecot.conf /etc/dovecot/dovecot.conf
COPY ./files/addDovecotUser.sh /addDovecotUser.sh

RUN chmod +x /addDovecotUser.sh

ENV LANG=de_DE.utf8

EXPOSE 143

ENTRYPOINT ["dovecot", "-F"]

addDovecotUser.sh

To setup a user in the Dovecot instance, I have written the following script, which should be placed in the folder files in the folder, where the Dockerfile is placed.

#!/bin/bash

adduser $1
usermod -aG users $1
usermod -aG dovecot $1

mkdir -p /home/$1/Maildir/cur
mkdir -p /home/$1/Maildir/new
mkdir -p /home/$1/Maildir/tmp

chown -R $1:$1 /home/$1

dovecot.conf

Because I run and access the Dovecot instance only locally, I did not setup a configuration with SSL.

listen = *
auth_mechanisms = plain login
#log_path = /var/log/dovecot.log
log_path = /dev/stdout
mail_location = maildir:~/Maildir
protocols = imap
service imap-login {
inet_listener imap {
port = 143
}
}
ssl = no
disable_plaintext_auth = no

userdb {
driver = passwd
}
passdb {
driver = pam
}
protocol imap {
imap_idle_notify_interval = 2 mins
imap_max_line_length = 64 k
imap_client_workarounds = tb-extra-mailbox-sep
}
mail_max_userip_connections = 20

Docker Compose

At the end I use Docker Compose to setup and run the Dovecot instance. I limit the ressources for the Dovecot, for me it was enough.

services:
dovecot-server:
image: dovecot-server:latest
restart: always
cpus: 0.50
mem_limit: 1024m
mem_reservation: 256m
volumes:
- dovecot-server-home-volume:/home
networks:
- dovecot-net
ports:
- "143:143"
networks:
dovecot-net:
volumes:
dovecot-server-home-volume:

With

docker compose up 

you can start the local dovecot instance (I use Portainer with stacks to setup the infrastructure).

Setup a mailaccount in Dovecot

To create a new mailaccount in your Dovecot instance, you can execute bash inside the container and use it to execute the shell script. First execute the bash:

docker exec -it dovecot-server-dovecot-server-1 bash

Then execute the shell script and give the account name as an argument. It will ask you some more infos, which are not needed (except the password) and can be left empty (just press return):

root@f41d9f10fa99:/# ./addDovecotUser.sh test
info: Adding user `test' ...
info: Selecting UID/GID from range 1000 to 59999 ...
info: Adding new group `test' (1004) ...
info: Adding new user `test' (1004) with group `test (1004)' ...
info: Creating home directory `/home/test' ...
info: Copying files from `/etc/skel' ...
New password:
Retype new password:
passwd: password updated successfully
Changing the user information for test
Enter the new value, or press ENTER for the default
Full Name []: testaccount
Room Number []:
Work Phone []:
Home Phone []:
Other []:
Is the information correct? [Y/n]
info: Adding new user `test' to supplemental / extra groups `users' ...
info: Adding user `test' to group `users' ...
root@f41d9f10fa99:/#
Now you should have an imap account which could be used.
In Thunderbird I used the following configuration:
Server: localhost
Port: 143
Connection security: none
Auth method: password, unencrypted

Next step will be setup of imapsync, which will be used to sync the mails by imap protocol.

Setup GitLab and GitLab-Runner with Docker

For learning GitLab CI/CD pipeline stuff, I had the idea to install GitLab on my notebook. To make things easy to setup, I use Docker and on top of it Portainer CE. With this I can use Docker Compose configurations with a WebUI.

When I was writting this blogpost, GitLab 17.2 was the current released version, I wanted to use GitLab CE. I only want to use this GitLab installation from my notebook. First thing I learned: using localhost is not really possible. The hostname of the notebook is thinkpad, so the configurations will also use this DNS-name and the GitLab installation will be available by https://thinkpad/.

To setup the GitLab CE installation and a GitLab-Runner, I use the following Docker Compose configuration.
Warning: starting of the GitLab instance can take some time!

version: '3.6'
services:
gitlab:
image: gitlab/gitlab-ce:17.2.1-ce.0
container_name: gitlab
restart: always
hostname: 'thinkpad'
networks:
- gitlab-network
environment:
GITLAB_OMNIBUS_CONFIG: |
# Add any other gitlab.rb configuration here, each on its own line
external_url 'https://thinkpad'
ports:
- '80:80'
- '443:443'
- '22:22'
volumes:
- gitlab-config:/etc/gitlab
- gitlab-logs:/var/log/gitlab
- gitlab-data:/var/opt/gitlab
shm_size: '256m'

gitlab-runner:
image: gitlab/gitlab-runner:latest
container_name: gitlab-runner
restart: always
networks:
- gitlab-network
volumes:
- gitlab-runner-config:/etc/gitlab-runner
- /var/run/docker.sock:/var/run/docker.sock

volumes:
gitlab-config:
gitlab-logs:
gitlab-data:
gitlab-runner-config:

networks:
gitlab-network:
After that, it was not possible to register the GitLab-Runner with the GitLab-instance. When I tried to register, I got errors like
x509: certificate signed by unknown authority
or
tls: failed to verify certificate: x509: certificate relies on legacy Common Name field, use SANs instead

I had to create my own X509 certificates and made them available in the GitLab and GitLab-Runner containers (or more precise inside of the volumes that contains the configurations).

The paths used in the commands below are based on the Docker Compose configuration up here. If you use different volume names, you have to adjust the names below. I needed to execute the commands as root, so a

sudo su -

was done first. First the new certificate is created, important is the part with the subjectAltName configuration.

cd /var/lib/docker/volumes/gitlab_gitlab-config/_data/ssl/
openssl genrsa -out thinkpad-ca.key 2048
openssl req -new -x509 -days 365 -key thinkpad-ca.key -subj "/C=CN/ST=GD/L=SZ/O=Acme, Inc./CN=Acme Root CA" -out thinkpad-ca.crt
openssl req -newkey rsa:2048 -nodes -keyout thinkpad.key -subj "/C=CN/ST=GD/L=SZ/O=Acme, Inc./CN=*.thinkpad" -out thinkpad.csr
openssl x509 -req -extfile <(printf "subjectAltName=DNS:thinkpad") -days 365 -in thinkpad.csr -CA thinkpad-ca.crt -CAkey thinkpad-ca.key -CAcreateserial -out thinkpad.crt

Check that the right hostname is configured into the certificate:

openssl s_client -connect thinkpad:443 </dev/null 2>/dev/null | openssl x509 -noout -text | grep DNS:

In my case it returned

DNS:thinkpad


Now we have to link the certificate files into the GitLab-Runner configuration.

ln -s /var/lib/docker/volumes/gitlab_gitlab-config/_data/ssl/thinkpad.crt thinkpad.crt
ln -s /var/lib/docker/volumes/gitlab_gitlab-config/_data/ssl/thinkpad.key thinkpad.key

Restart the GitLab and GitLab-Runner instance.

When the GitLab instance is back online, try register the GitLab-Runner.

docker exec -it gitlab-runner gitlab-runner register

Runtime platform arch=amd64 os=linux pid=52 revision=9882d9c7 version=17.2.1
Runninginsystem-mode.

Enter the GitLab instance URL (for example, https://gitlab.com/):
https://thinkpad/
Enter the registration token:
glrt-somevalues
Verifying runner... is valid runner=yaoFUzzEE
Enter a name for the runner. This is stored only in the local config.toml file:
[b018679db44f]: instance
Enter an executor: custom, docker, docker-windows, docker-autoscaler, shell, ssh, parallels, virtualbox, docker+machine, kubernetes, instance:
docker
Enter the default Docker image (for example, ruby:2.7):
alpine:latest
Runner registered successfully. Feel free to start it, but if it's running already the config should be automatically reloaded!

Configuration (with the authentication token) was saved in "/etc/gitlab-runner/config.toml"

After that, the GitLab-Runner is shown in GitLab as online.

We need to give the GitLab-Runner the certificates for the CA and the GitLab instance. Without it, the connection could not be established:

cd /var/lib/docker/volumes/gitlab_gitlab-runner-config/_data/certs
cp /var/lib/docker/volumes/gitlab_gitlab-config/_data/ssl/thinkpad-ca.crt ca.crt
cp /var/lib/docker/volumes/gitlab_gitlab-config/_data/ssl/thinkpad.crt .
cp /var/lib/docker/volumes/gitlab_gitlab-config/_data/ssl/thinkpad.key .

After that, restart the GitLab-Runner with

docker restart gitlab-runner


If you login the first time to your GitLab instance and you are wondering, where you can find the initial root passwort (and yes, username is root):

/var/lib/docker/volumes/gitlab_gitlab-config/initial_root_password

Smart Home – Control OpenHab devices with Alexa

At home, I use OpenHab to control my smart home devices. Until some months, we used only the mobile apps from OpenHab to control the smart home devices.

Because most of our rooms have an Amazon Echo device installed, I was wondering, if I could use the smart home features of Alexa. I found ha-bridge, which I used to control the smart home devices from Homematic directly (without OpenHab). ha-bridge emulates a Philips Hue Gateway, which the Echo/Alexa system can find and integrate into its smart home control.

Because I started now to integrate ZigBee based smart home devices into our home, I needed to find another solution, because ha-bridge could not be used to control the ZigBee devices. I thought…and was wrong.

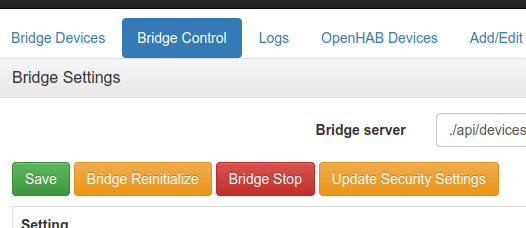
ha-bridge has the ability to integrate OpenHab devices. On the webpage of your ha-bridge instance, open „Bridge Control“.


Scroll down until you see the entry „OpenHAB Names and IP Addresses“


Enter here a name for your OpenHab instance, its ip address, port and credentials, if needed. After entering all values, scroll up and press „Save“.


After a short time, you should see after a refresh „OpenHAB Devices“. If open this page, you should see all devices, which are configured in OpenHab. 

With „Build Item“ you can create the entry for the „Bridge Devices“ list, which is then made available over the Philips Hue emulation.

Setup Docker in Fedora 31

For setting up Docker on Fedora 31, I used the documentation found here: https://docs.docker.com/install/linux/docker-ce/fedora/ 

Following problems occured:

1. Url to Docker repo seems to be wrong

Documentation mention to add https://download.docker.com/linux/fedora/docker-ce.repo as repo. With this, errors occur and docker-ce could not be installed. I had to use the following url, with this I could install it: https://download.docker.com/linux/fedora/31/x86_64/stable

sudo dnf config-manager --add-repo https://download.docker.com/linux/fedora/31/x86_64/stable

2. Error while executing docker run

After installation I tried Docker with the default example:

sudo docker run hello-world

Instead of showing the expected output it showed me the following error message:

docker: Error response from daemon: OCI runtime create failed: container_linux.go:346: starting container process caused "process_linux.go:297: applying cgroup configuration for process caused \"open /sys/fs/cgroup/docker/cpuset.cpus.effective: no such file or directory\"": unknown.

After searching around I found on bug mention the same error: https://github.com/microsoft/vscode-docker/issues/1402

In there it was pointing to a solution: https://fedoraproject.org/wiki/Common_F31_bugs#Docker_package_no_longer_available_and_will_not_run_by_default_.28due_to_switch_to_cgroups_v2.29

sudo grubby --update-kernel=ALL --args="systemd.unified_cgroup_hierarchy=0"

Problem is, that with Fedora 31 Cgroups v2 was enabled while Docker still uses Cgroups v1.

Connect Nokia 8 with Ubuntu 18.04 for filetransfer

Install packages for Media Transfer Protocol

sudo apt-get install mtpfs mtp-tools

Check, if your machine has the file /etc/udev/rules.d/69-libmtp.rules.

sudo less /etc/udev/rules.d/69-libmtp.rules

If not copy it from /lib/udev/rules.d/69-libmtp.rules.

sudo cp /lib/udev/rules.d/69-libmtp.rules /etc/udev/rules.d/69-libmtp.rules

Now open the copied file with root rights and add the following line

# Nokia 8
ATTR{idVendor}=="2e04", ATTR{idProduct}=="c025", SYMLINK+="libmtp-%k", MODE="660", GROUP="disk", ENV{ID_MTP_DEVICE}="1", ENV{ID_MEDIA_PLAYER}="1"

I had at the end the following lines in my file

# Parrot Bebop Drone
ATTR{idVendor}=="19cf", ATTR{idProduct}=="5038", SYMLINK+="libmtp-%k", MODE="660", GROUP="audio", ENV{ID_MTP_DEVICE}="1", ENV{ID_MEDIA_PLAYER}="1"
# Isabella Her Prototype
ATTR{idVendor}=="0b20", ATTR{idProduct}=="ddee", SYMLINK+="libmtp-%k", MODE="660", GROUP="audio", ENV{ID_MTP_DEVICE}="1", ENV{ID_MEDIA_PLAYER}="1"

# Nokia 8
ATTR{idVendor}=="2e04", ATTR{idProduct}=="c025", SYMLINK+="libmtp-%k", MODE="660", GROUP="disk", ENV{ID_MTP_DEVICE}="1", ENV{ID_MEDIA_PLAYER}="1"

# Autoprobe vendor-specific, communication and PTP devices
ENV{ID_MTP_DEVICE}!="1", ENV{MTP_NO_PROBE}!="1", ENV{COLOR_MEASUREMENT_DEVICE}!="1", ENV{libsane_matched}!="yes", ATTR{bDeviceClass}=="00|02|06|ef|ff", PROGRAM="mtp-probe /sys$env{DEVPATH} $attr{busnum} $attr{devnum}", RESULT=="1", SYMLINK+="libmtp-%k", MODE="660", GROUP="audio", ENV{ID_MTP_DEVICE}="1", ENV{ID_MEDIA_PLAYER}="1"

LABEL="libmtp_rules_end"

Information, how to setup udev can you find here: https://wiki.ubuntuusers.de/MTP/